How to set up a Signal
This tutorial shows you how to set up a Signal and explains the settings you need to fill in.
Prerequisites
Before you begin, check the following:
- You have an Explorer, Adventurer, or Hero Cryptohopper subscription
Set up a Signal
- Go to your Crypothopper account.
- Click “Marketplace”.
- Click “Signals”.
- Choose a Signaler. Want to know if a Signaler is the right fit for you? Click here.
- Click on that Signaler.
- Click “Subscribe” or “Buy”. Pay for the subscription if needed.
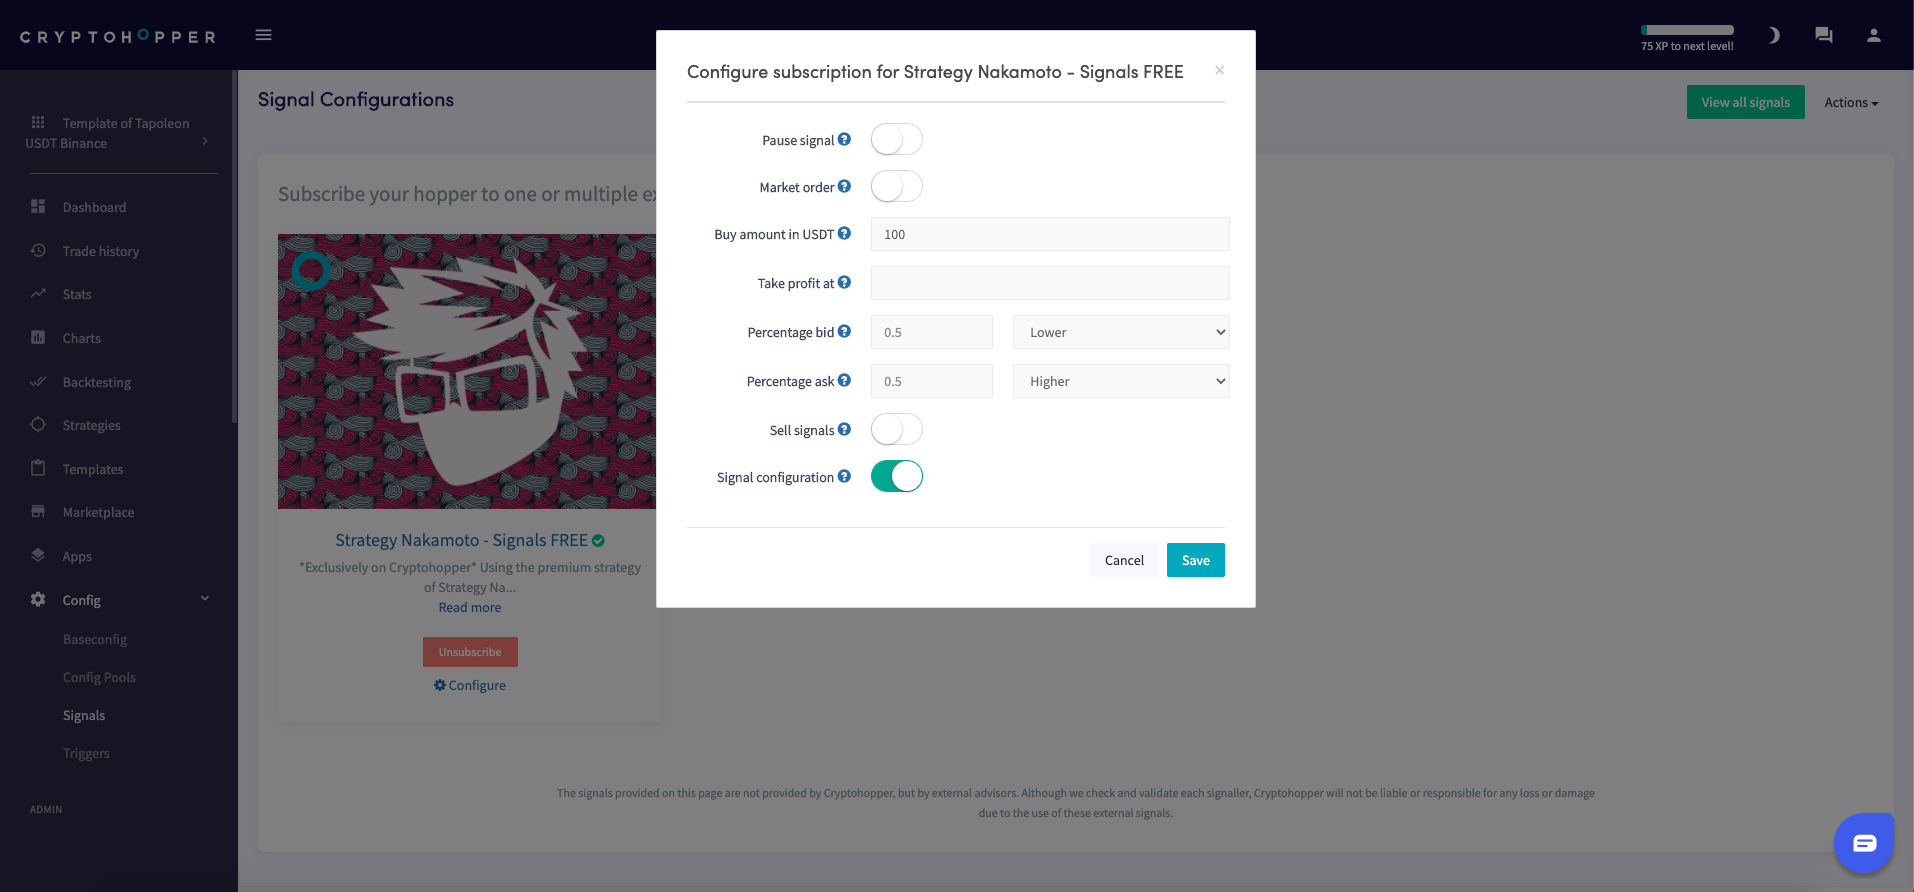
- Click “Configure”.
- Configure the Signal settings. These settings are optional.
- Click “Save”.
- Click “My bots”.
- Click on the bot where you want to add the Signal.
- Click “Configuration”.
- Click “Baseconfig”.
- Select the currencies you want to trade. Please review the Signaler's performance report to confirm if trading signals were sent for your quote currency, the selected currencies listed under "Coins and amounts," and the exchange used to ensure your bot will start trading.
- Click “Strategy”.
- Only switch the “Signals only” toggle if you only want to use Signals. Otherwise don’t switch it. If you do switch the toggle also fill in the “Number of targets to buy”.
- Click “Save”.

Note that when using Triggers to load different templates, you must subscribe to the Signaler in both templates, as you won’t receive trading signals when your bot loads another template.
Click here to find out more about the Signal config settings.

